TencentOS ServerTencentOS Server 3.1 安装 pytorch 及运行 AI 相关模型
环境准备
GPU 机型要求
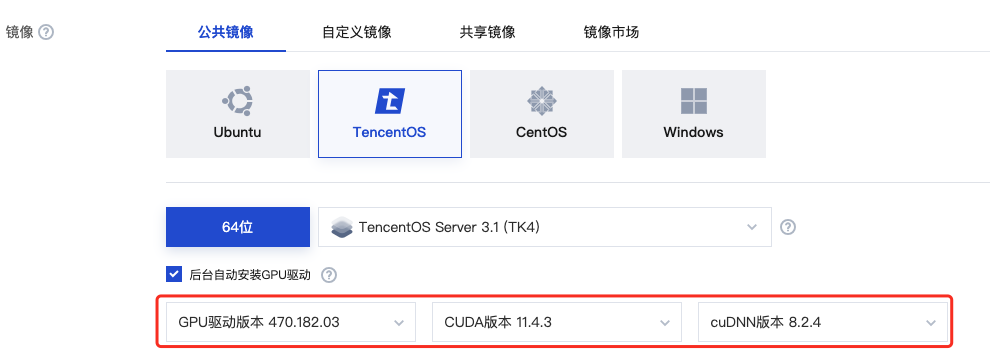
购买 GPU 机型时,根据需求选择下图所示的 GPU 驱动版本、CUDA 版本、cuDNN 版本。
Python 3 版本要求
必须为 3.8 及以上版本,检查方法如下:
[root@VM-0-21-tencentos ~]# python3 -VPython 3.8.16[root@VM-0-21-tencentos ~]# pip3 -Vpip 19.3.1 from /usr/lib/python3.8/site-packages/pip (python 3.8)[root@VM-0-21-tencentos ~]#
如果 Python 版本不满足要求,请按照如下步骤操作:1. 安装 Python 3.8。
yum install -y python3.8
2. 配置 Python 3.8 为默认的 Python 3 版本。
cd /usr/bin/ && rm /usr/bin/python3 && ln -s python3.8 python3
3. 配置 pip 3.8 为默认的 pip 3 版本。
cd /usr/bin/ && rm /usr/bin/pip3 && ln -s pip3.8 pip3
安装 pytorch
您可以执行如下命令安装 pytorch。
pip3 install torch==1.12
安装 pytorch 后,您也可以执行如下命令检查 pytorch 是否安装成功。
[root@VM-0-21-tencentos ~]# pip3 list | grep torchtorch 1.12.0[root@VM-0-21-tencentos ~]#
典型模型示例
Stable Diffusion
网站地址:https://huggingface.co/runwayml/stable-diffusion-v1-5 说明:该网站为国外网站,下载速度可能较慢,取决于您的网络性能。1. 安装依赖的软件包。
pip3 install diffusers transformers
2. 将如下 Python 代码保存为 Python 脚本。假设脚本名称为:stable_diffusion.py。
from diffusers import StableDiffusionPipelineimport torch
model_id = "runwayml/stable-diffusion-v1-5"pipe = StableDiffusionPipeline.from_pretrained(model_id, torch_dtype=torch.float16)pipe = pipe.to("cuda")
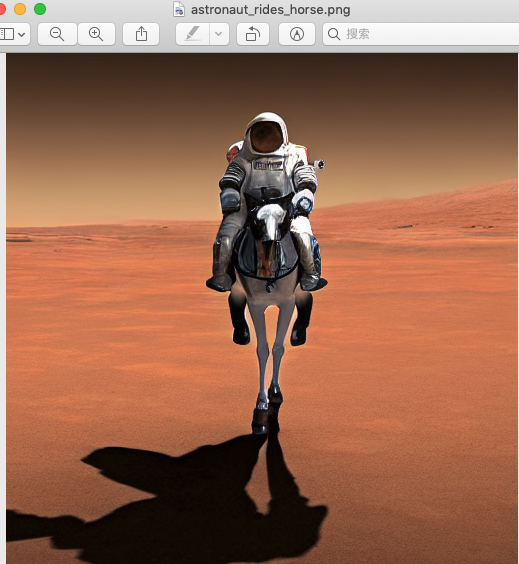
prompt = "a photo of an astronaut riding a horse on mars"image = pipe(prompt).images[0]
image.save("astronaut_rides_horse.png")
3. 运行上一步保存的 Python 脚本。
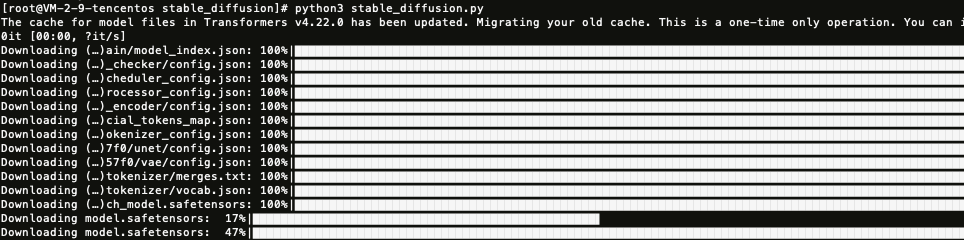
上图展示的是等待下载模型所需要的资源,最后会在当前目录生成一张图片:astronaut_rides_horse.png。训练结果如下:
百川 13B 对话模型
网站地址:https://modelscope.cn/models/baichuan-inc/Baichuan-13B-Chat/summary说明:该网站为国内模型网站,下载速度较快。1. 安装依赖的软件包
pip3 install modelscopepip3 install pip --upgrade #运行过程中会失败,需要升级pip3 install sentencepiece
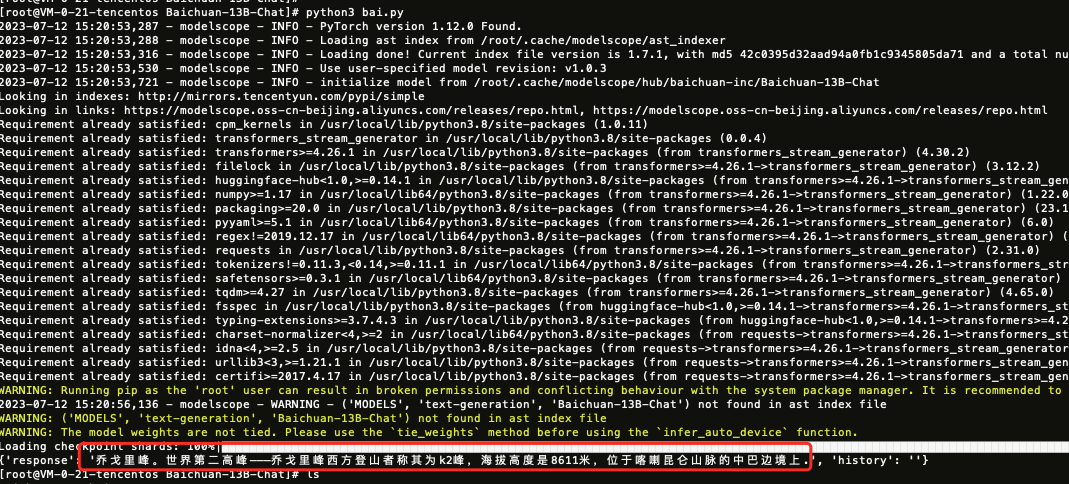
2. 运行如下 Python 脚本。
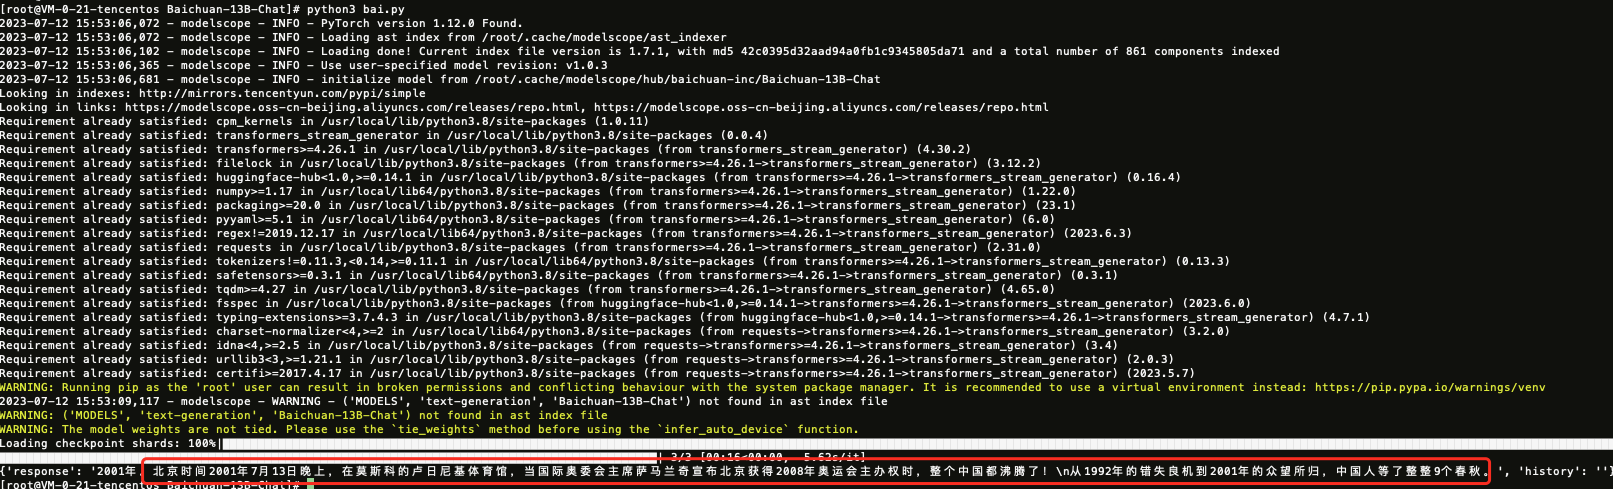
import torchfrom modelscope import snapshot_download, Modelmodel_dir = snapshot_download("baichuan-inc/Baichuan-13B-Chat", revision='v1.0.3')model = Model.from_pretrained(model_dir, device_map="balanced", trust_remote_code=True, torch_dtype=torch.float16)messages = []messages.append({"role": "user", "content": "世界上第二高的山峰是哪一座?"})response = model(messages)print(response)
模型运行结果如下:
您也可以替换脚本中的提问,例如:北京申奥成功是哪一年?返回结果如下:
openjourney
网站地址:prompthero/openjourney · Hugging Face该例子使用源码的方式训练1. 安装软件:
yum install git-lfs -y
2. 下载 openjourney 对应的代码。
# Make sure you have git-lfs installed (https://git-lfs.com)git lfs installgit clone https://huggingface.co/prompthero/openjourney
# if you want to clone without large files – just their pointers# prepend your git clone with the following env var:GIT_LFS_SKIP_SMUDGE=1
下载过程可能较慢,其中有三个大文件,需要耐心等待。
3. 运行如下脚本:
from diffusers import StableDiffusionPipelineimport torchmodel_id = "/root/openjourney_code/openjourney" #修改为你本地的目录即可pipe = StableDiffusionPipeline.from_pretrained(model_id, torch_dtype=torch.float16)pipe = pipe.to("cuda")prompt = "retro serie of different cars with different colors and shapes, mdjrny-v4 style"image = pipe(prompt).images[0]image.save("./retro_cars.png")
运行结果如下:

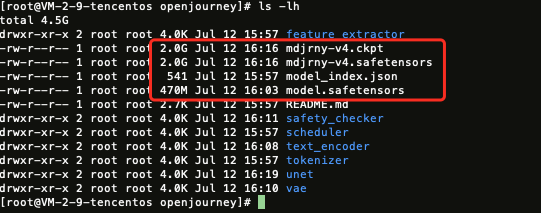
运行完毕会生成一张图片,如下图所示:

注意:如果出现类似如下报错,说明 GPU 显存不够,需要更高配置的 GPU 机型。
RuntimeError: CUDA out of memory. Tried to allocate 1.25 GiB (GPU 0; 14.76 GiB total capacity; 12.96 GiB already allocated; 993.75 MiB free; 12.96 GiB reserved in total byPyTorch) If reserved memory is >> allocated memory try setting max_split_size_mb to avoid fragmentation. See documentation for Memory Management
官网1折活动,限时活动,即将结束,速速收藏
同尘科技为腾讯云授权服务中心。
购买腾讯云产品享受折上折,更有现金返利。同意关联立享优惠
- 0人点赞 -
相关推荐

腾讯云实时互动教育版产品动态_音视频解决方案_同尘科技
腾讯云多人音视频房间SDK多人音视频房间 SDK 2.0版本发布和推荐升级公告_音视频解决方案_同尘科技
腾讯云多人音视频房间SDKSDK2.0版本升级指引_音视频解决方案_同尘科技
暂无评论,你要说点什么吗?